Posts

Working with the SlidingPaneLayout
Image
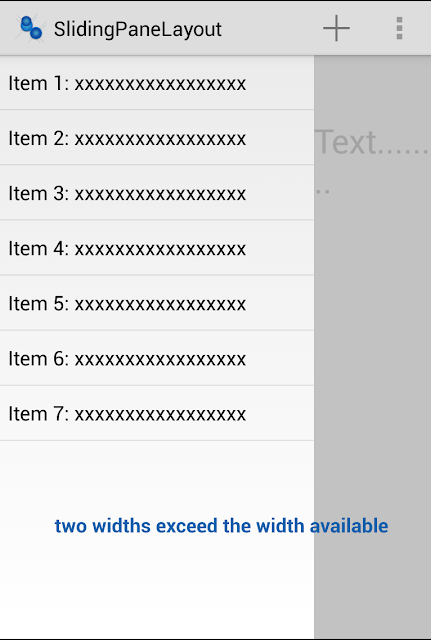
In the latest I/O 2013, Google showed a new app, Google Hangouts. This app is designed around the SlidingPaneLayout , which is a new addition to the support library. It provides and easy way to create two pane screens. You define the two panes and how much room they need to display. If the device has insufficient space to show both at once, the content pane will overlap the master pane and you can slide horizontally to reveal it; then swipe back to content. Implementing the SlidingPaneLayout is simple. The components required are now included in the latest support library (release 13). We can start with the layout file,and we'll add its tag to our layout XML file for an Activity. Like the DrawLayout the SlidingPaneLayout contains two children, the first child is the Master or left pane and the second child is the content or detail pane. For each pane you define the width that the pane requires. If the sum of these two widths exceed the width ...
Creating a Navigation Drawer

Image
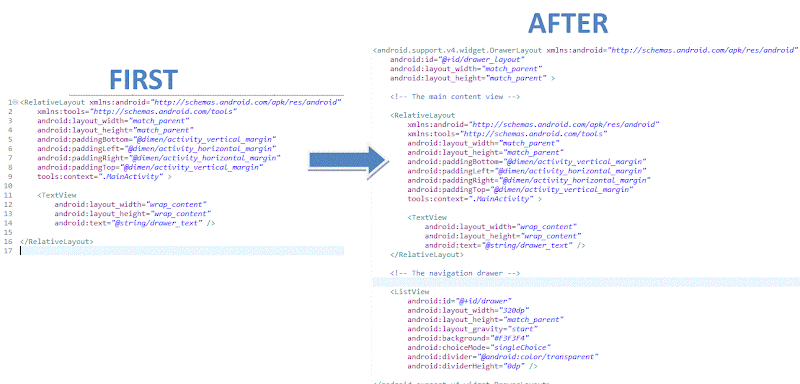
In the latest I/O 2013, Google added a new pattern: Drawer Navigation . I think Google did really good job. You can find official design guidelines here . Implementing drawer navigation is simple. The components required are now included in the latest support library (release 13). The first thing that we need to do is modify our layout and insert a DrawerLayout. It is important to note: The main content view (the RelativeLayout above) must be the first child The width of the navigation drawer should be between a minimum of 240 dp and a maximum of 320 dp The height of the navigation drawer should be match_parent The drawer view (the ListView) must specify its horizontal gravity with the android:layout_gravity It is enough to get a empty Navigation Drawer working. If we swipe from the left hand edge of the screen our Navigation Drawer appears. Now we can populate our List with a simple Adapter. @Override protected v...

How to work with JSON in Android

Image
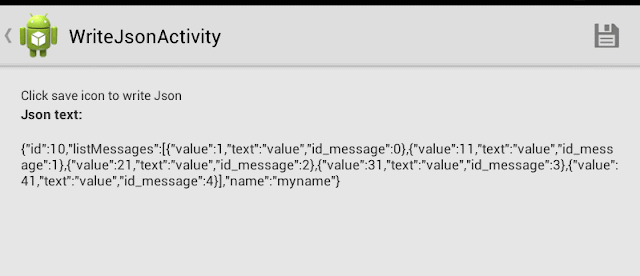
In this post I'll describe a way to work with JSON in Android. . First of all, what is JSON. JSON is short for JavaScript Object Notation and it is an independent data exchange format. Data structures in JSON are based on key / value pairs and we can summarize in these points: JSON Object : { string : value , .... } JSON Array : [ value , value .....] value : string || number || object || array || true || false, || null If you observe normally JSON data will have square brackets and curly brackets. The difference between [ and { is, the square bracket represents starting of an JSONArray node whereas curly bracket represents JSONObject. This is an example: { "id":10, "name":"myname", "listMessages": [ { "value":1, "text":"value", "id_message":0 }, { "value":11,"text":"value","id_message":1} ] }...

Restore sms from Google Drive

In previous post I described how to backup sms in Google Drive. In this post I will try to restore sms from a backup saved in Google Drive, and I will also use the new app data folder . As always, it is just an example. It is quite simple, but pay attention , you will write your SMS Content Provider. In order to backup sms, in our app we can do these steps: Choose a Google Account through AccountPicker.newChooseAccountIntent() . Search for a backup file from Google Drive Parse the backup file Update Sms Content Provider In our example we will search our backup file in a Google Drive folder or in appdata folder. . Files.List request = mService .files() .list() .setQ("mimeType = '" + MIME_TEXT_PLAIN + "' and '" + folderId + "' in parents "); If you want to use appdata folder, folder...

Backup sms in Google Drive

Image
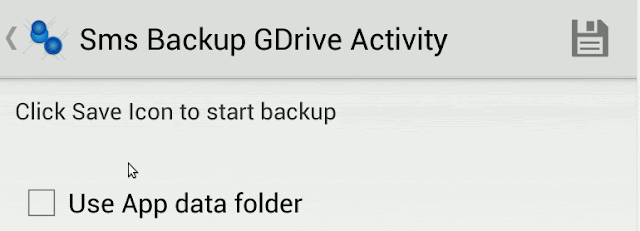
In previous post I described how to make simple actions with Google Drive from own apps. In this post I will try to do a simple sms backup in a google drive folder, and I will use the new app data folder . It is a quite simple operation.If you've already understood how to use Google Drive, the only difficulty is to find a way to retrieve sms from your device. There are many implementations on the web, but there are not public API. I choose to use TelephonyProviderConstants that you can find in the awesome DashClock app. First of all we have to do these steps described in previous post: Enable the Drive API from Google API Console Add Drive API v2 to your project Make sure the Google Play Services client library is being included in the Android's project build path Then,in order to backup sms, in our app we can do these steps: Choose a Google Account through AccountPicker.newChooseAccountIntent() . Create a Folder in Google Drive Read sms from device Crea...

Simple actions with Google Drive API v2

Image
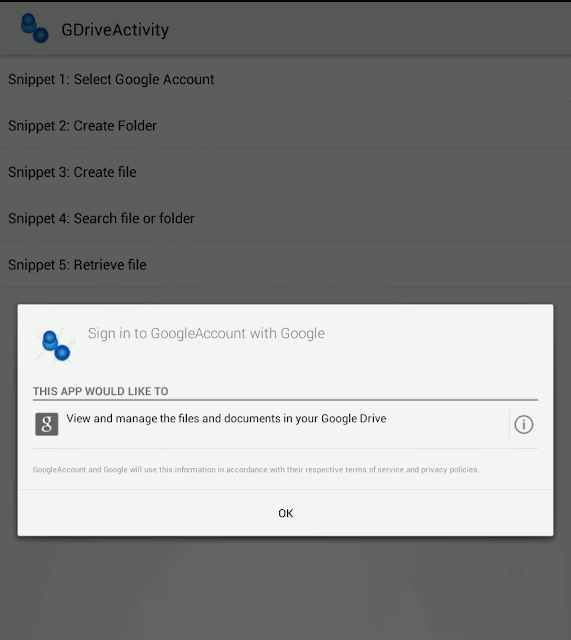
In this post I'll describe how to make simple actions with Google Drive from own apps. First of all you have to do these steps: Enable the Drive API from Google API Console Add Drive API v2 to your project Make sure the Google Play Services client library is being included in the Android's project build path You can find official doc here . It is very simple. Now we can try to use API. In order to use Google Drive, we have to choose a Google Account . It is very easy, and I described it in a previous post. In a real app, you can save your account in preferences. CREATE A FOLDER When we use Google Drive API, we have to get a token. We can use this code: private void initService() { mCredential = GoogleAccountCredential.usingOAuth2(this, DriveScopes.DRIVE); if (mAccountName != null) { mCredential.setSelectedAccountName(mAccountName); mService = getDriveService(mCredential); } } private Drive getDriveService(GoogleAccountCredenti...

GUI like Evernote Menu

Image
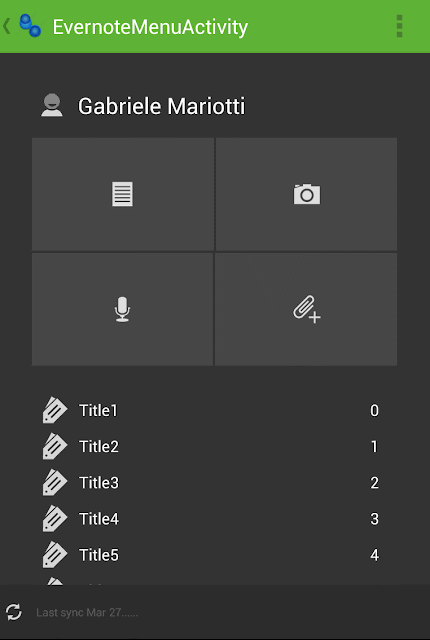
In previous post I tried to make a GUI like Google Keep . In this post I tried to clone Evernote Menu layout. As always,do not take this code too seriously, it is just an example. We start with ActionBar. With Android Action Bar Style Generator (by Jeff Gilfelt) we choose a background and generate our zip code. We take only the part that interests us and integrate it. For our Activity we choose a RelativeLayout , and we put it under ActionBar. Then we start with first component. We put a ScrollWiew . .............. Inside the scrollView we put a LinearLayout that will contain all components. The first box will contain Account info. We use a LinearLayout with a ImageView and a TextView. .... Then we put a divider, a box with 2x2 buttons and another divider. We can do it in many ways, with a GridView for example. I choose to use this lay...